Saturday 29 June 2013

Crackle 2 Go!

Ok. Managed to buy new materials to restart the project. At the hobby shop, I saw MDF boards which would probably not melt under high temperature. 

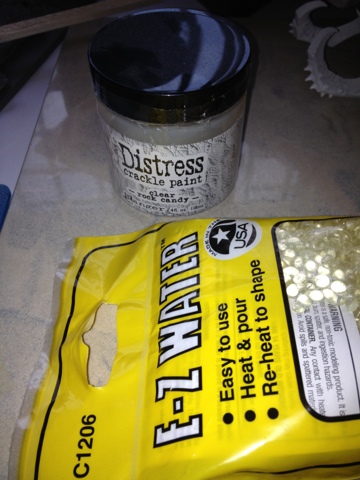
Assembled and primed the frame last night. Painted it this morning to kick-off the 24 hour wait for the crackle to form. This time round, I made sure I put in a thick layer of crackle paint, to make sure the warping does not occur again. 

At 0900 hours

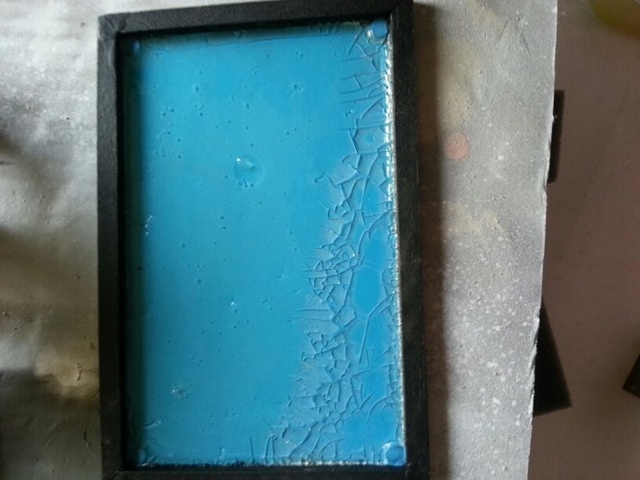
At 1115 hours the next day. 


Crackling look much better, bigger more distinct cracks. No warping of individual pieces but still does not adhere to the base. But I am overall satisfied with the end product. 

Next step is to apply the washes to the cracks. Maybe I might apply a layer of gloss to it in order to make the ice stand out. Lets see how the inking goes. 

Crackle one has failed :(

Sigh. It's hard to have spent money and effort on custom building a base and declare it a failure. Yes. My custom base for my Thundertusk has failed. 


Multiple failure reasons:
1. Crackle paint applied too thin and started warping once it dried.
2. Tried to remedy above by going over with watered-down white glue - didn't work.
3. Wanted blue ink to stay within the cracks but since there's warp, paint went under the painted instead. 
4. Easy water was final nail in the coffin. Tried pouring heated Easy Water into base. Realize that it was not hot enough had did not flow, resulting in the globby mess. 
5. Plasticard base cannot take the temperature and started melting as well.

Ran out of materials to make a new base. Just a terrible night...

Thursday 27 June 2013

Thundertusk Update 2


Ok. Did some minor stuff today. Primed the plinth before going out so as to let the paint dry by the time I get back in the evening. 

Then painted the rims and the "ice" blue to give it that glacier blue look. Then poured in a thick layer of crackle paint. Here's what it looks. Can't really see the crackle since its transparent. 

More updates on how the crackling went. 

If a paint could crackle

So... After 12 hours or so overnight.. The crackle paint has started to cure.. Albeit quite slowly. 


Rest of the area still wet and does not even look like its drying out. Will see if its dried out by the time i get home today. 

15 hours curing time...


18 hours...


20 hours


24 hours


Not too satisfactory. The layer I applied was too thin, resulting in some of the shards lifting up. I am gonna try brushing a layer of watered down white glue to see if it helps

Wednesday 26 June 2013

Back on track

Hobby been on the back burner last few days as I have been spending spare time on Xcom. However, with my attendance in Singapore ETC Masters confirmed, need to go back on schedule.

I will be going in with my OK list and after stock taking, I have every model I need for the army, apart from the Thundertusk. 

Tried mounting the large base on my plinth but it was too hard to cut and maintain a plausible shape of the frame. Dropping the idea of mounting and will stick Thundertusk straight on top of the completed diorama. 

Sticking in the magnets for today and base coating it. 

Saturday 15 June 2013

Thundertusk Updates 1

Done with the first wash of sepia to give it  the warm tone. Thereafter, heavy dry brushes of commando kaki, bleached bone, skull white and finally a deliberate highlight of skull white on the ends of the fur is the current fur result. As for the exposed skin, it's an extremely heavy drybrush of skull white. 


Went on to do the face and exposed skin in a lighten shade of fenris gray. Decided to go lighter on the tusks so base coated the tusks and hooves in dheneb stone and will wash them black to have some contrast in color between fur and tusk. 


As for the base, green stuffed the corners where the frame didn't meet so that the eventual water effect does not leak and for better visual effect. 


Thursday 13 June 2013

Kick off project - Thundertask

All right!  Schools out. Back to my hobby. For my first project, I am going to carry on with my Thundertusk. I bought one kit and bought bits to have enough to build a stonehorn as well.


I read about an ice basing system from the following link 

http://www.vampirecounts.net/Thread-How-to-Base-your-models?page=3

and was inspired to create the same with my Thundertusk. But I needed to create a small platform to give the base the water volume. 


Couple of months back, I also got the crackle paint and just today managed to get the balsa strips and Woodlands Scenic Easy Water to commence my project. 


Before my exam hiatus, i had already assembled the beast and magnetized the saddles as well as the banner for easy storage. Primed the whole lot last night. 


Have not done much for the riders though but they'll come later. 


Anyway, my first step would be to give the clown a big wash of brown or sepia to set the skin tone. Not sure how that would turn out. More updates to come later.